How to Setup GA4 in GTM: Setup Guide

Google Tag Manager (GTM) is a Google-powered tag management system that lets you add additional tracking to your website. You can use GTM to track which buttons your website visitors have clicked on for your website. You can also integrate GTM with Google Analytics 4 (GA4) and install GA4 on your website. Here’s how:
Create a Google Tag Manager account
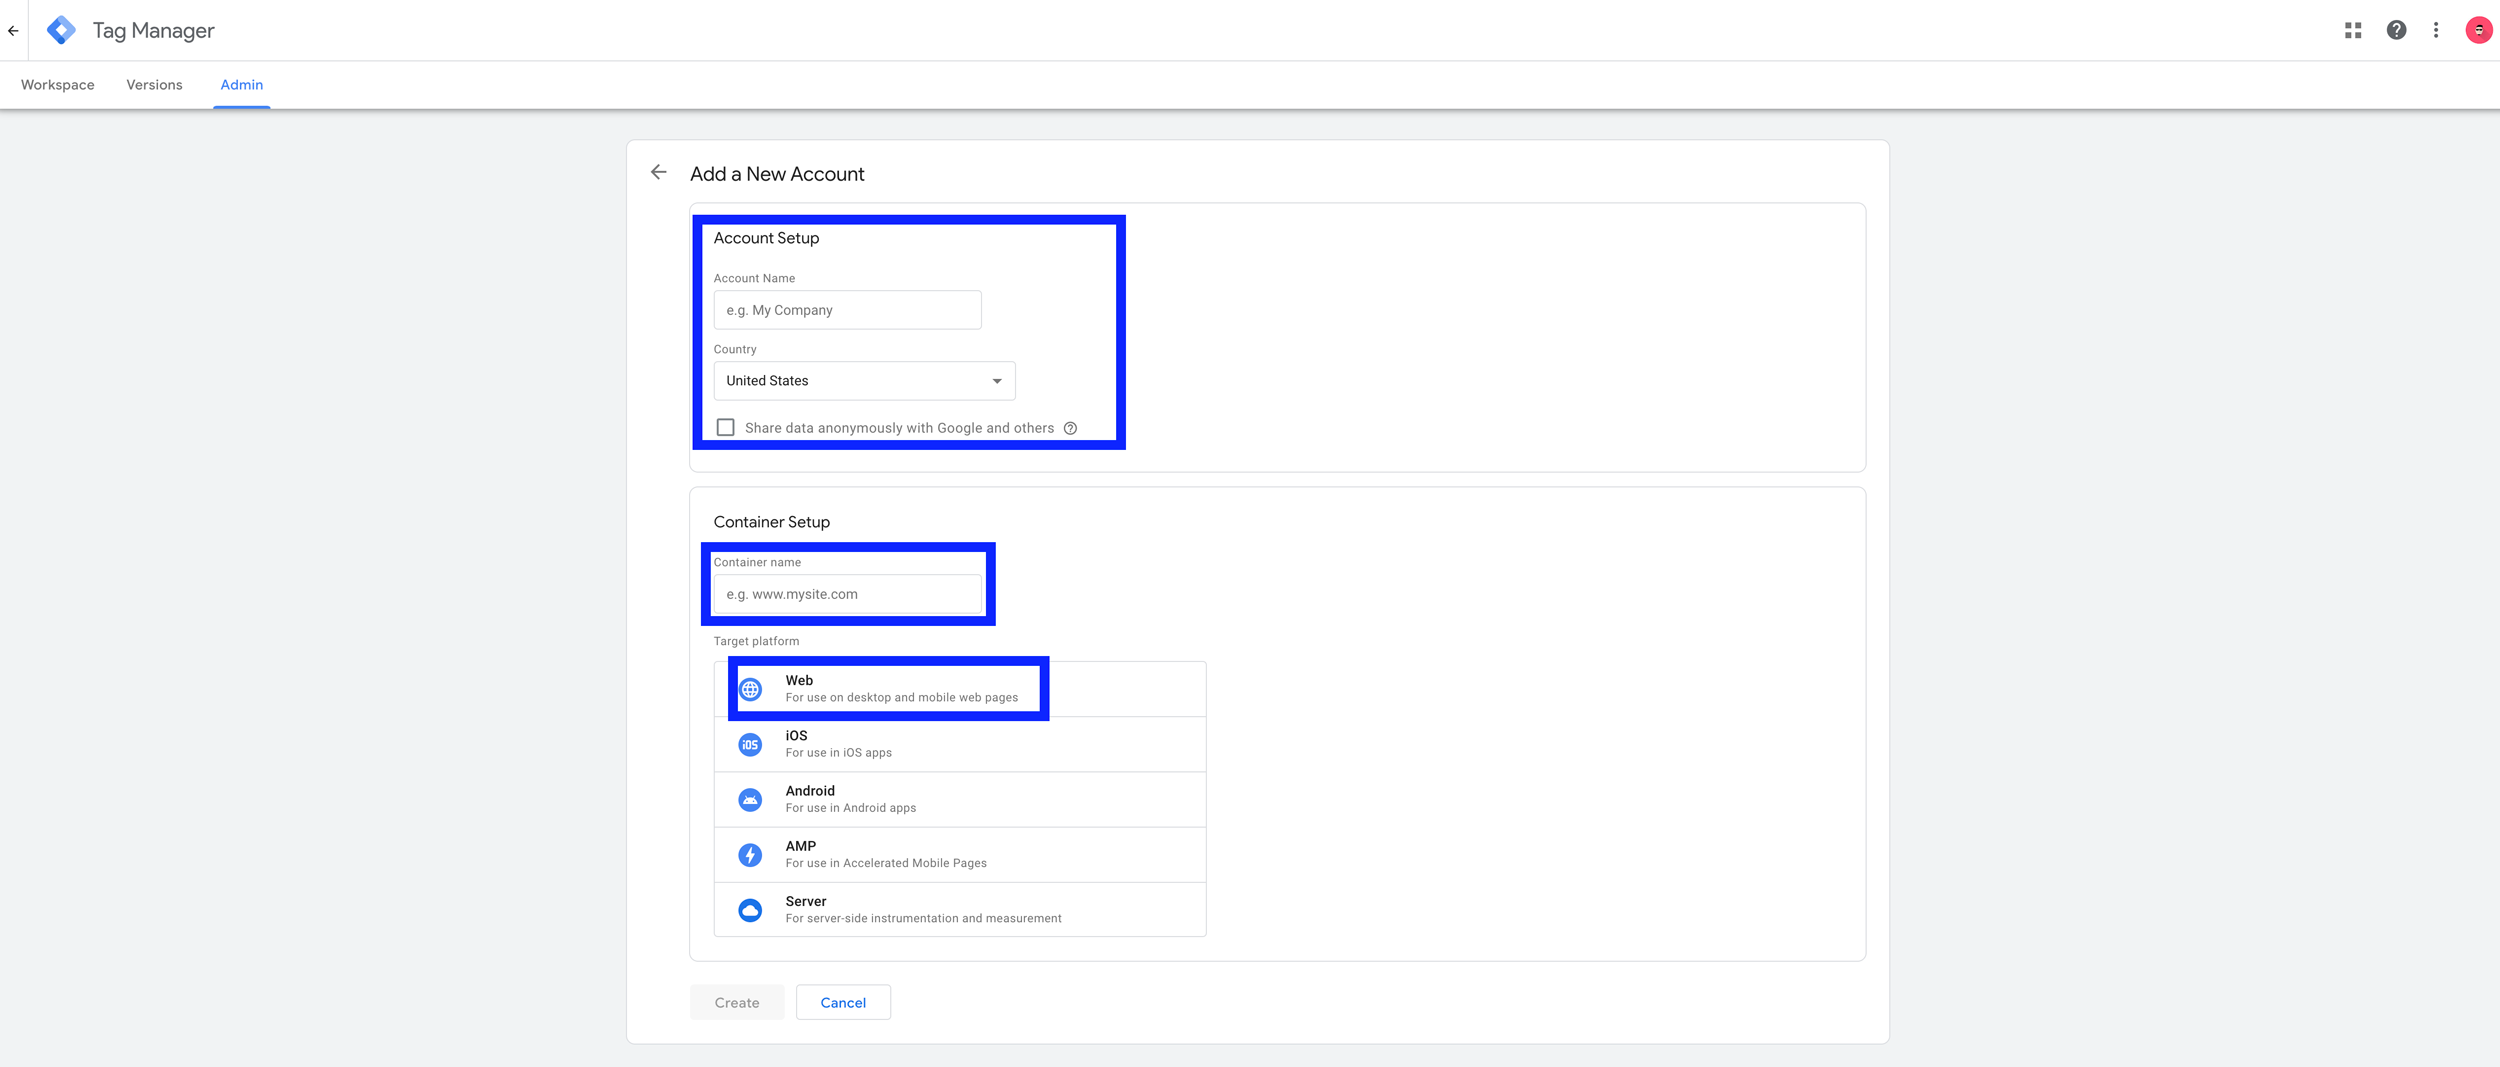
Go to Google Tag Manager and click on Create Account.

Fill in company information
Enter your website URL, country, target platform (e.g. website), and other information to complete your GTM account setup.

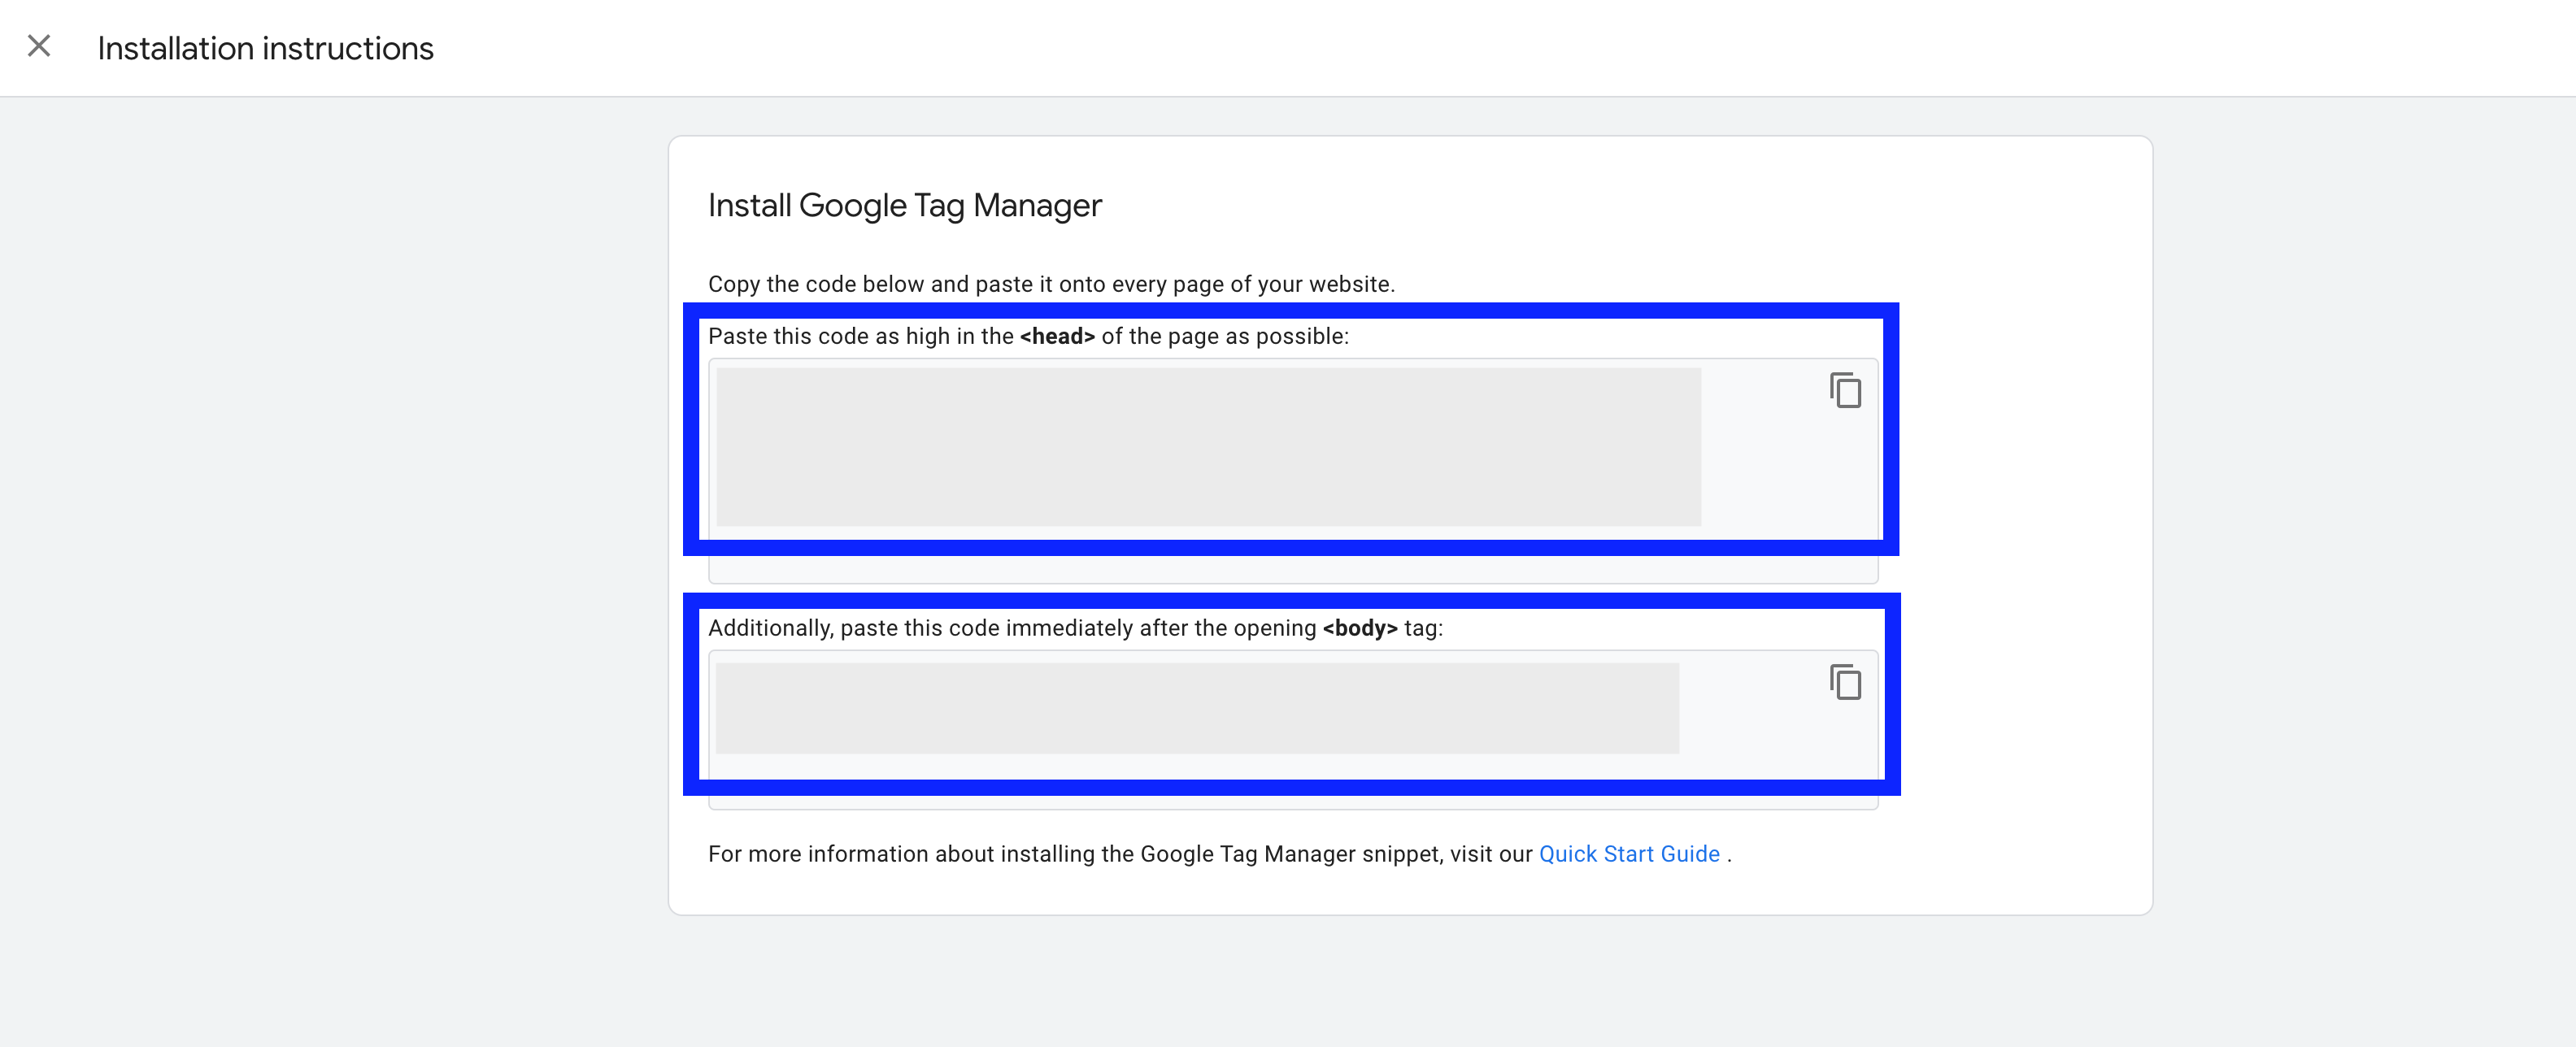
Go to admin, select install Google Tag Manager, and copy your GTM code


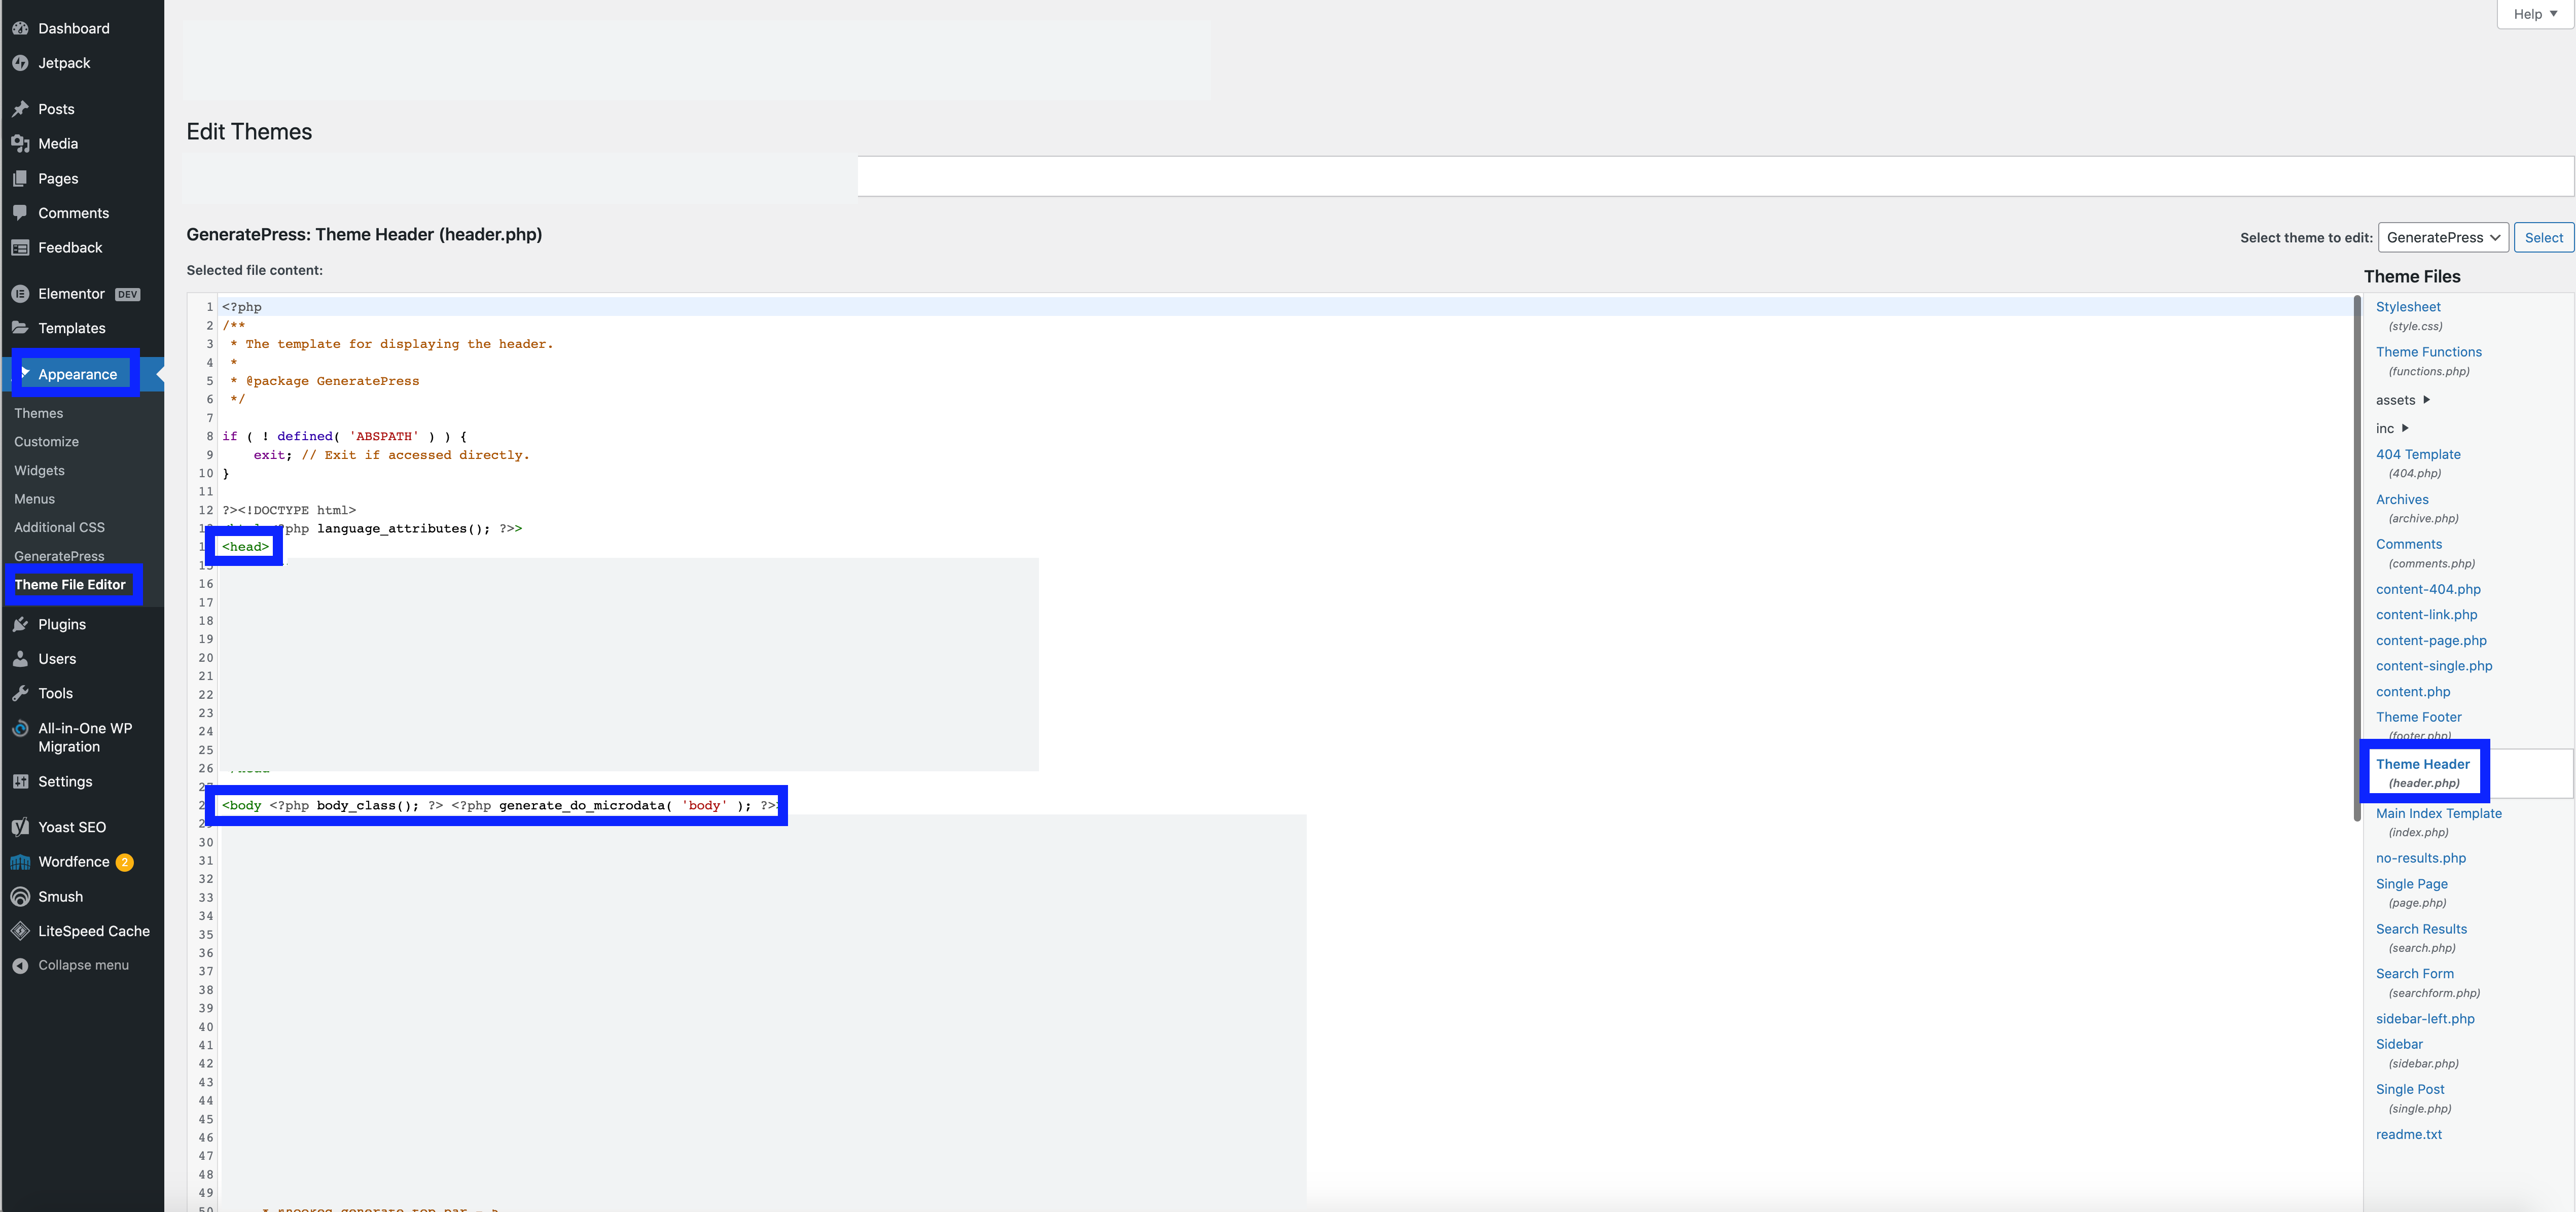
Go to your WordPress site and go to Appearance, click on Theme File Editor, and then select Theme Header on the right hand side

Paste your GTM codes in the head section and body section. Once pasted, GTM is officially set up on your website!
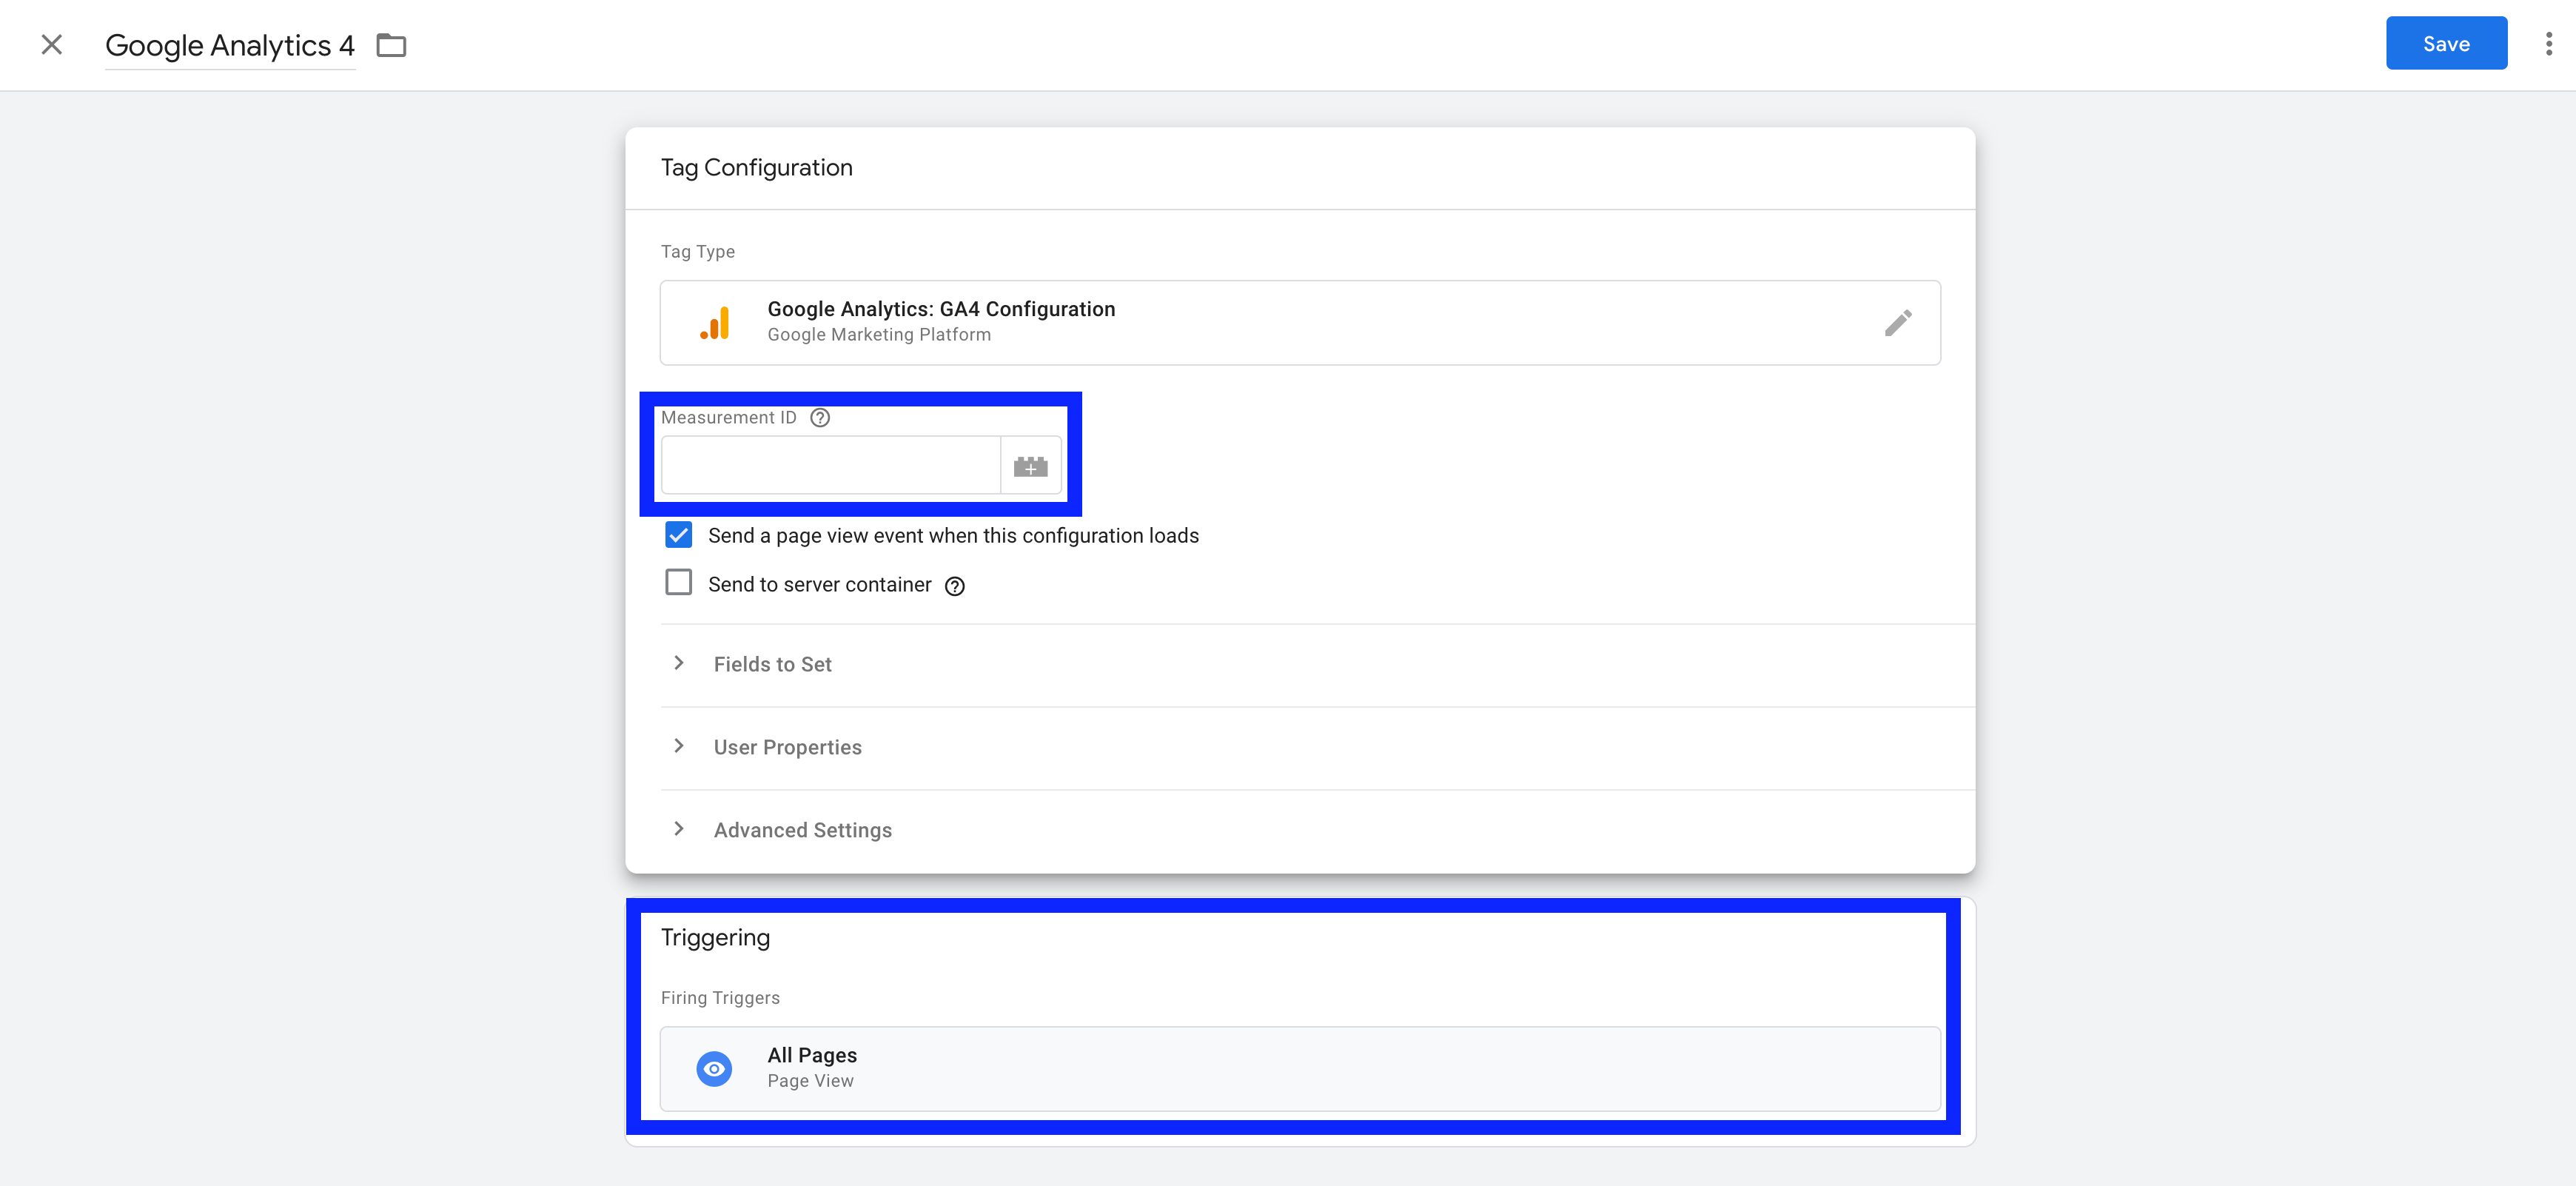
Now that GTM has been installed on your WordPress website, you can add GA4 to your website using GTM. To do so, go to your GTM account, select Tags, and click on New. Next, click on Tag Configuration and choose Google Analytics: GA4 Configuration.

Then, paste your GA4’s Measurement ID and select All Pages for Triggering.

Once the MeasureMent ID has been added, GA4 will start collecting website data on your WordPress website.
If you have any questions about GA4 setup on your WordPress website, please contact us for a discovery call and we’d be happy to help!

