How to Setup Google Analytics 4 Conversion Goals Using Google Tag Manager

Copy Your GA4 Measurement ID
Go to the Admin section and click on Data Streams.
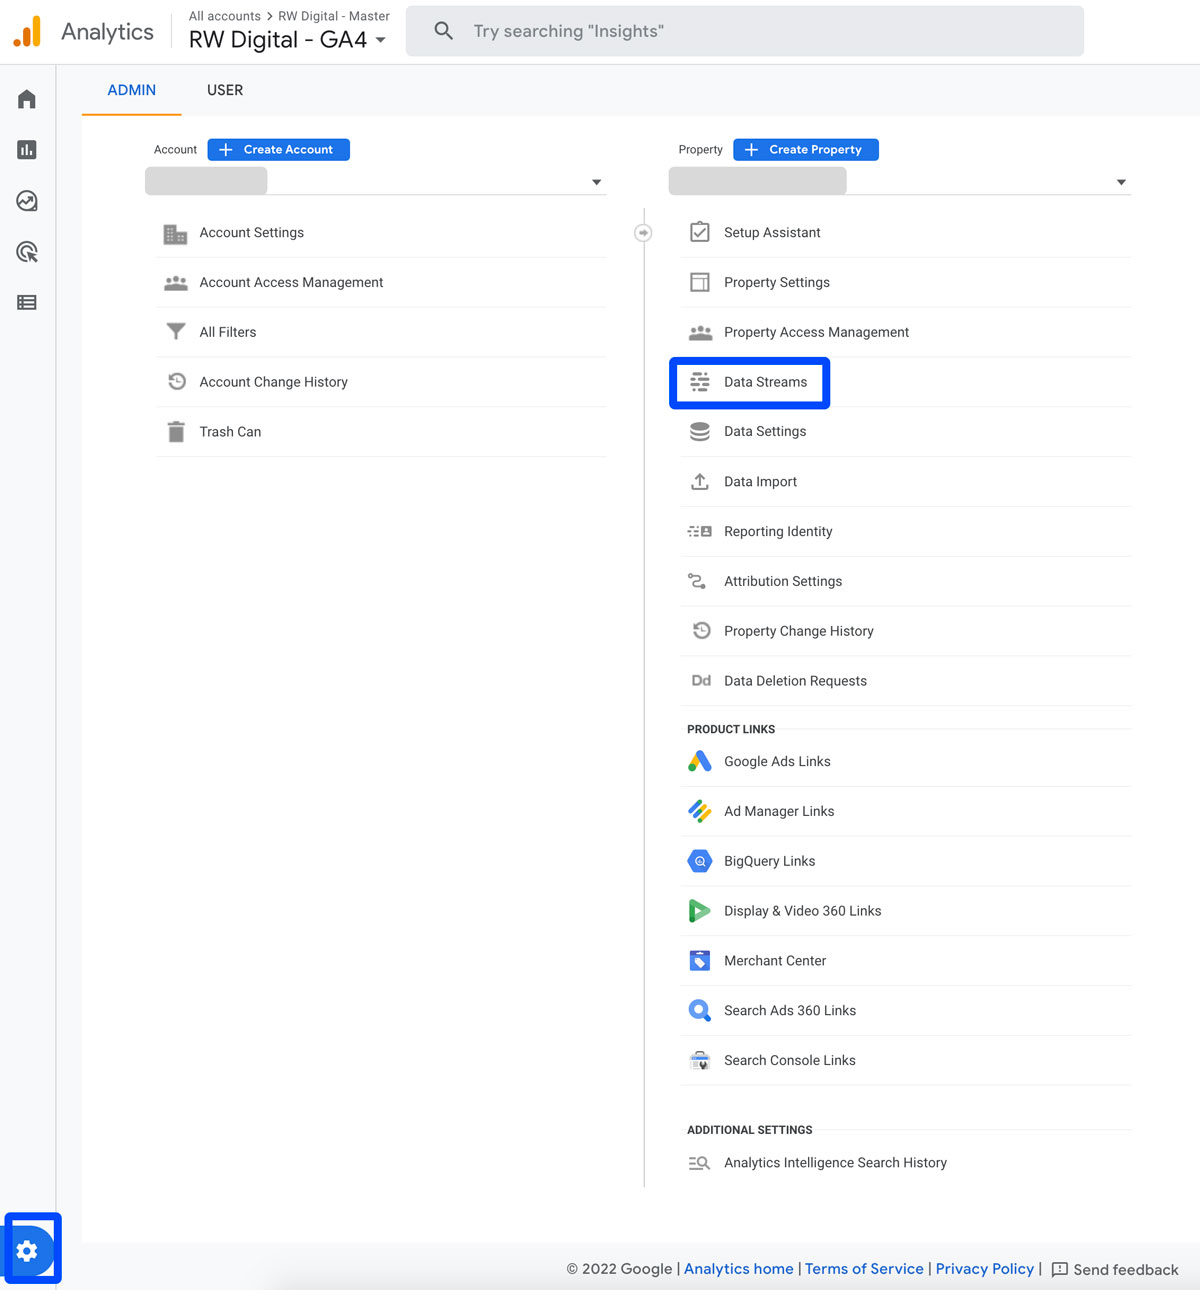
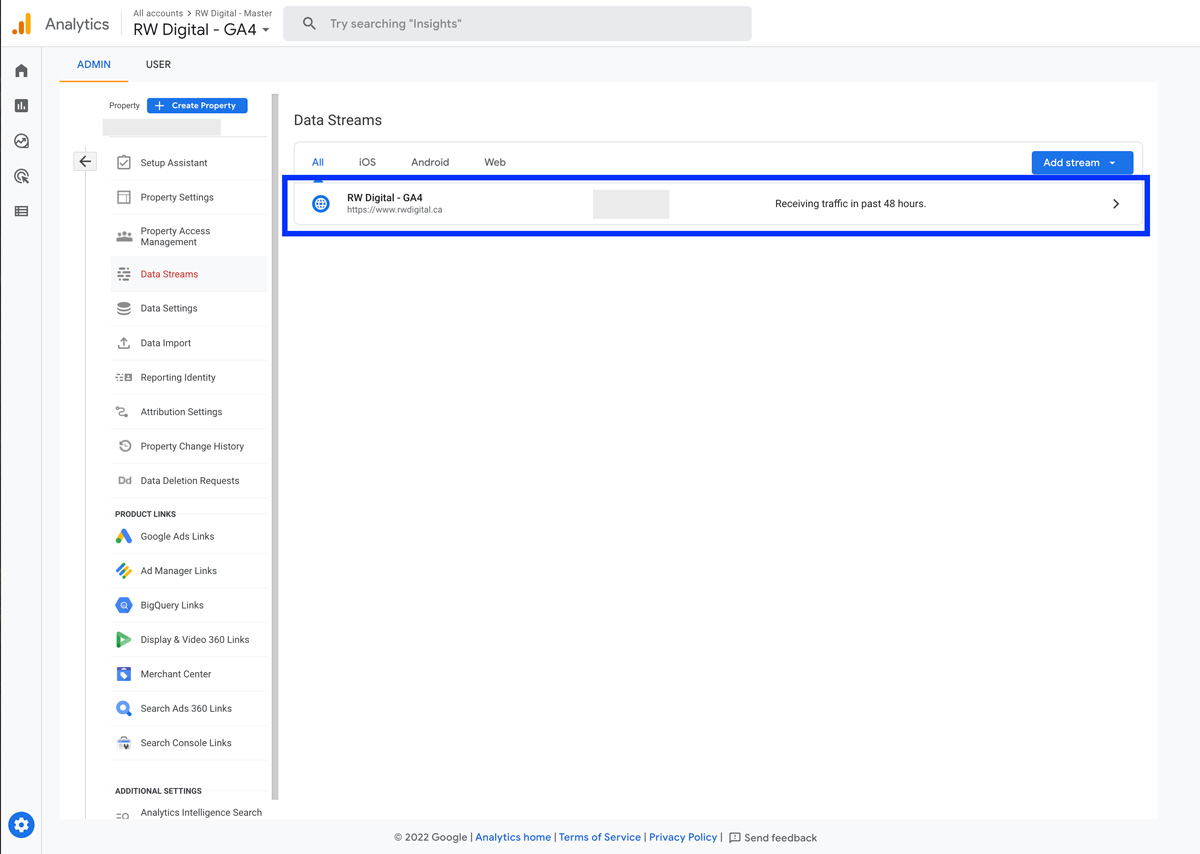
Then, copy your measurement ID.
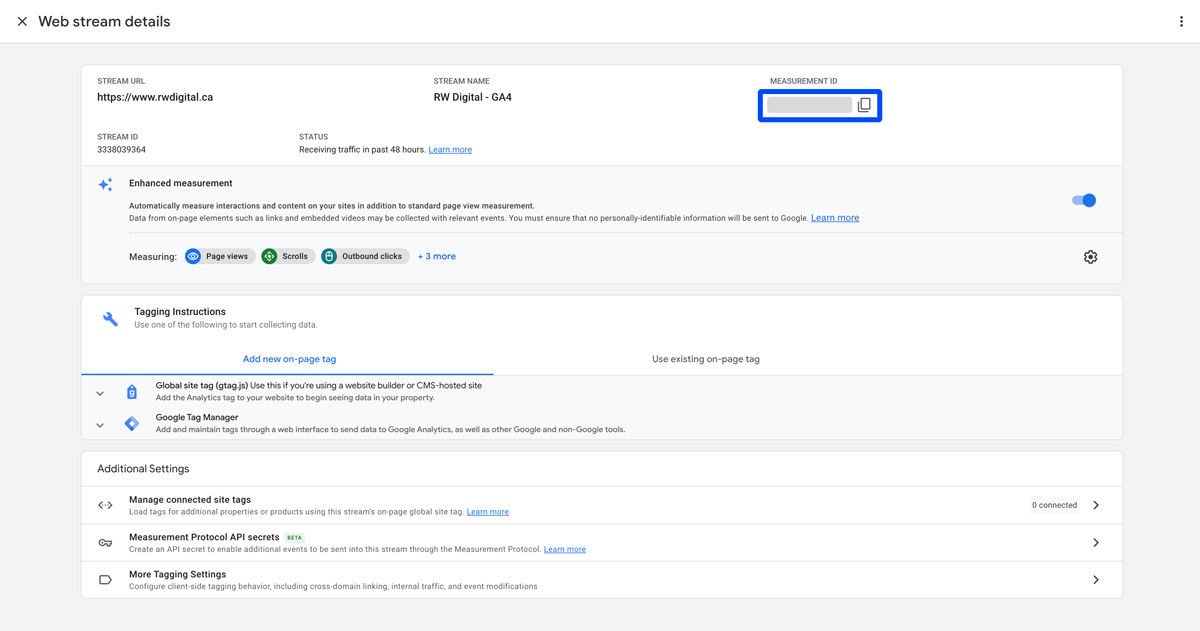
Integrate Your Google Analytics 4 Account With Your Google Tag Manager Account
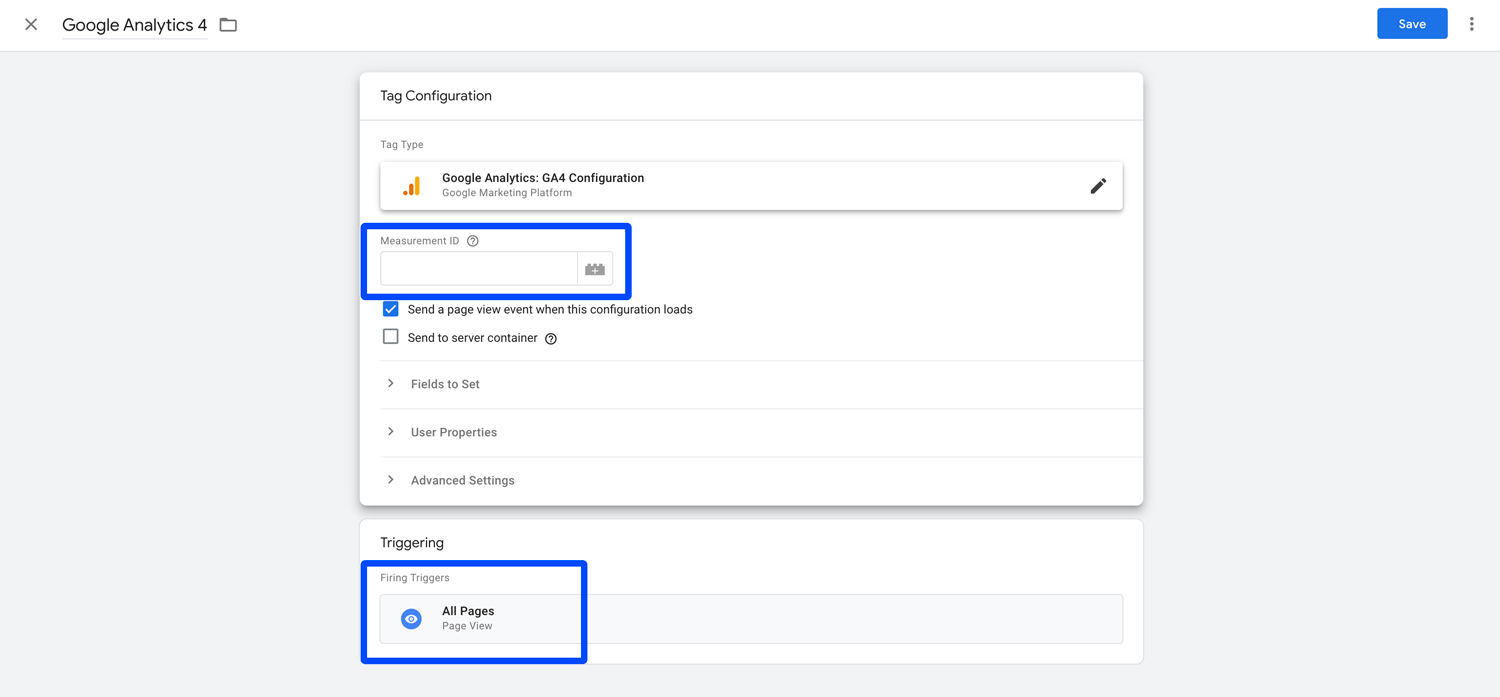
Go to your Google Tag Manager account and select Google Analytics: GA4 Configuration.
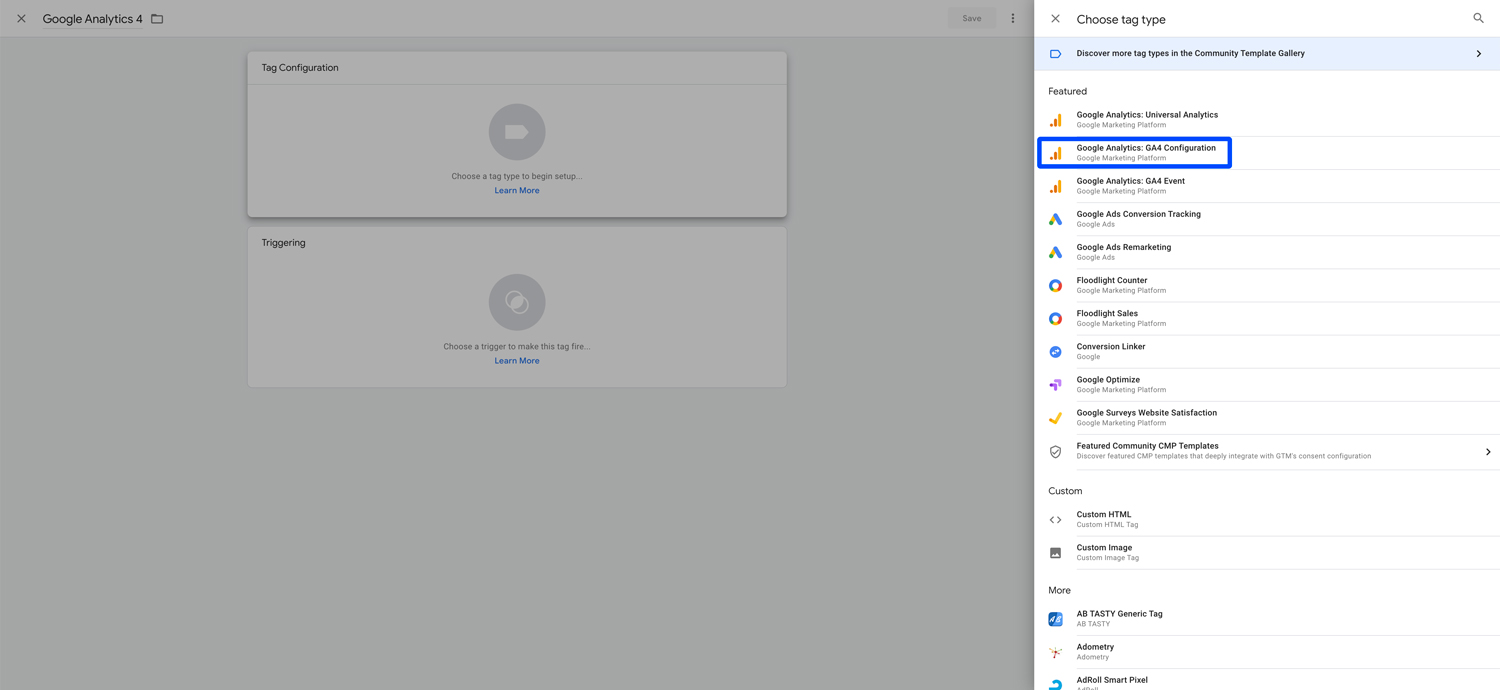
Paste your Measurement ID and select All Pages for Triggering so your GA4 code works across your entire website.
Create a Google Analytics GA4 Event
Select Google Analytics: GA4 Event
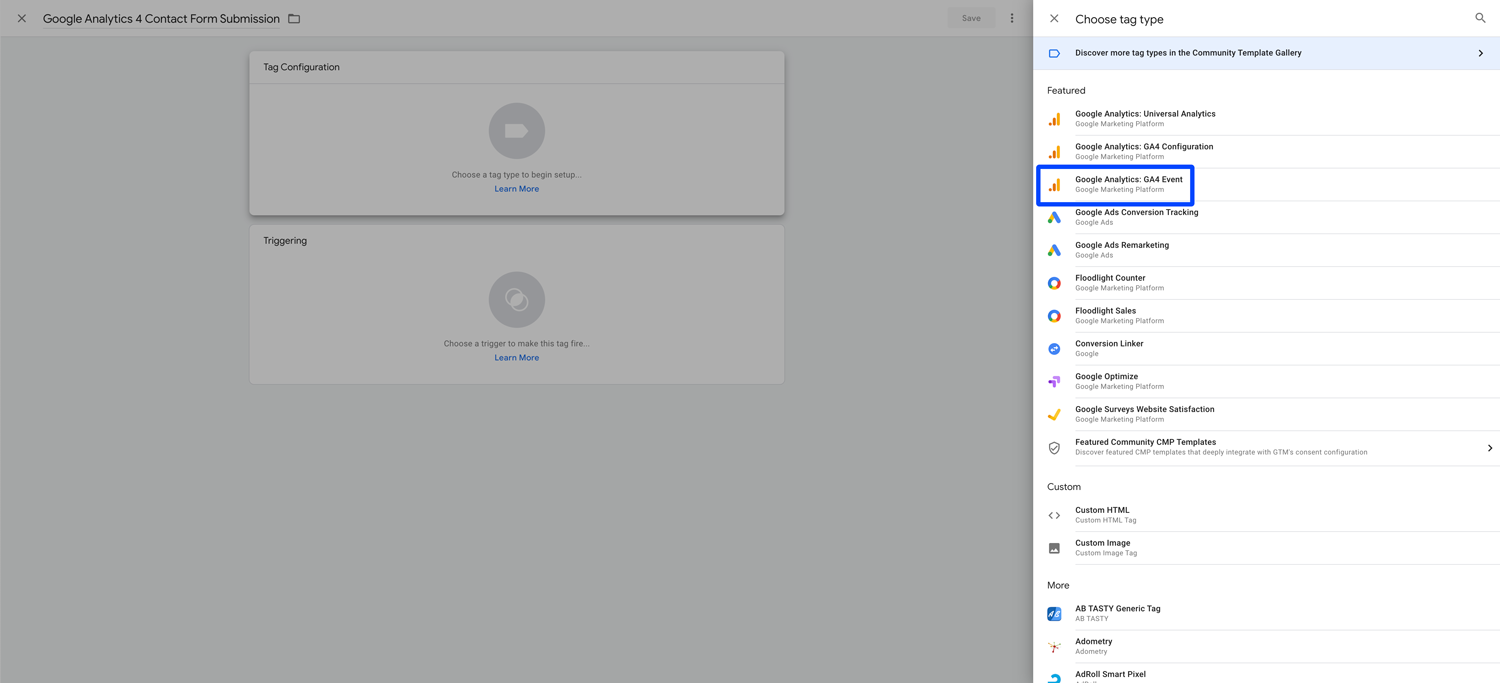
Select your Google Analytics 4 property, choose an event name (e.g. contact_form_submission), and enter the event parameter. For the event parameter, it depends on how you want to track your conversion. In our example, we want to track contact form submission by measuring the number of “thank you” pages that visitors are redirected to after submitting a contact form. The confirmation page URL includes the parameter “/thank-you-for-contacting-us/” and we’re using this parameter to track contact form submissions.
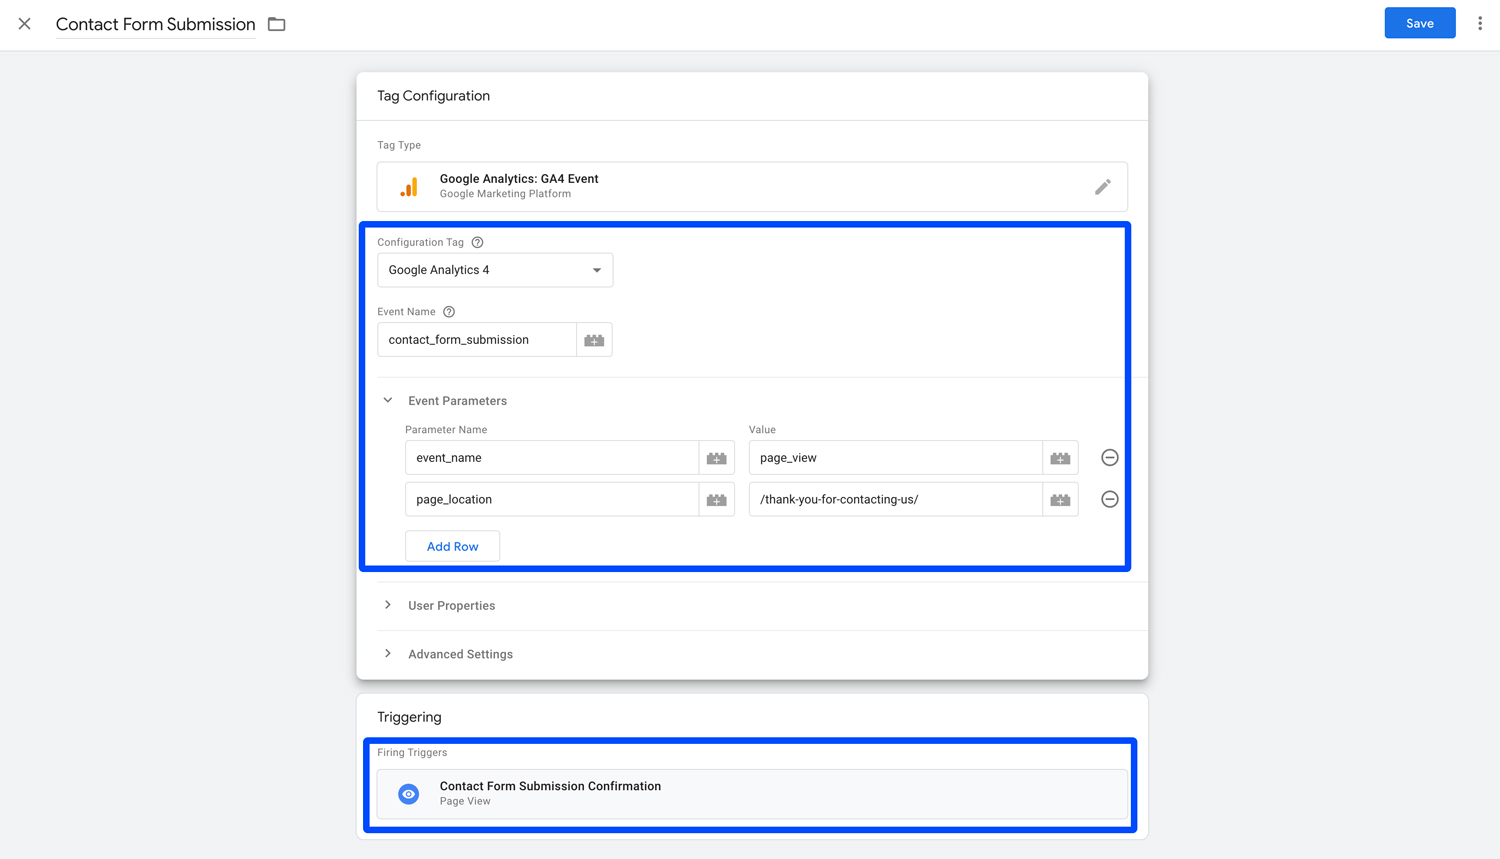
For the Triggering, use the confirmation URL, “/thank-you-for-contacting-us/”. Doing this lets you trigger your event when a visitor goes to the confirmation URL.

Enable Custom Google Analytics 4 Conversion in GA4
Enter the event name that you used for a custom event (e.g. contact_form_submission) and press save.

Make sure that the conversion goal is enabled.

To test whether your goal conversion is working, visit the page that you’ve used for page location in your browser. Then go to Report > Real Time in your GA4 account and see if GA4 is tracking the conversion.
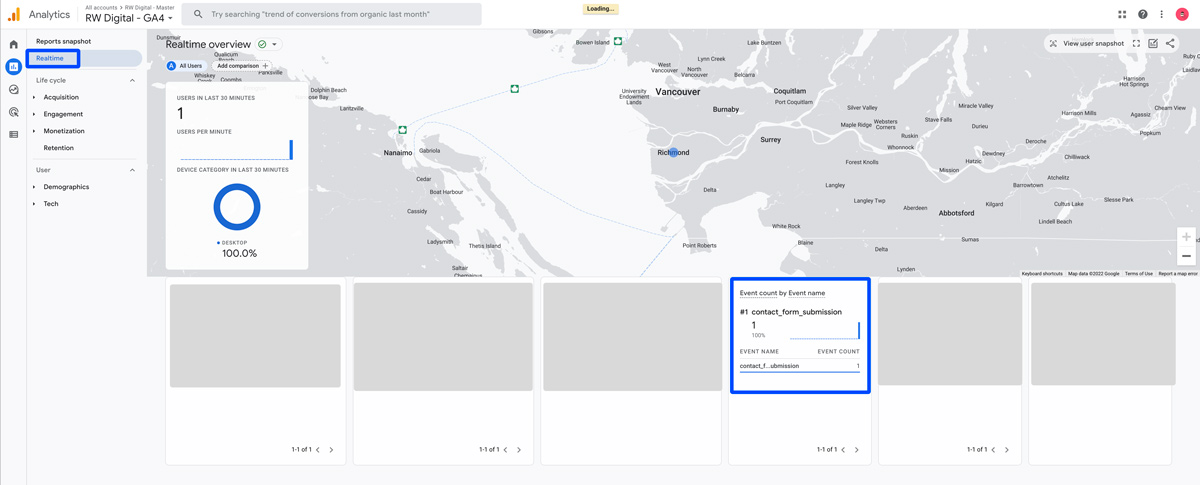
If you see your conversion in GA4 real time report, your conversion goal is working!

